
At any given moment, Recon Research is likely processing two or three strategic advisory projects for vendor, channel partner, and end-user clients.
Some of these projects are pretty well defined (e.g., defining the total addressable market, critiquing a client’s current roadmap, helping a provider understand their target customers, etc.). Other times, these projects involve the creation or development of complex themes or ideas. That’s where whiteboarding comes in.
Simple enough – right? Yes and No.
Recon Research believes in hybrid work. Our experts are distributed around the world and are frequently on the road at industry events or to support clients. In other words, it’s not often that our analysts are in the same physical place. As a result, physical dry-erase boards won’t cut it. That’s where virtual whiteboarding (or e-whiteboarding) comes in.
Two days ago, we needed all brains on deck to analyze the risk and reward potential of a new business model for a client. Given the complexity of the topic, we knew video alone wouldn’t cut it. To get the job done, we spun up the Webex Board in the Recon Research Test Lab.

We’ve had this Webex Board for more than a year, so we can’t highlight the unboxing process within this note. However, we’ll step through everything else one needs to do before inking.
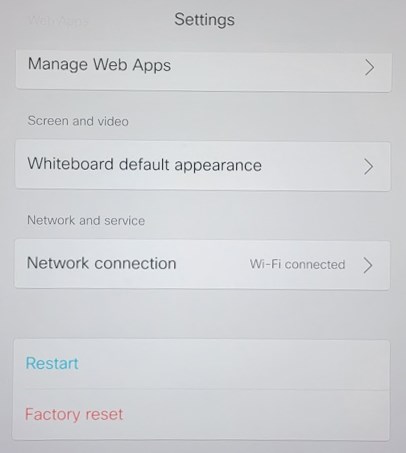
Step 1 – Factory Reset / Preparing for Registration
Whenever we reconfigure an existing device, we try to clear all prior settings by loading the factory defaults. The factory reset option on a Webex Board is available within the Settings menu.
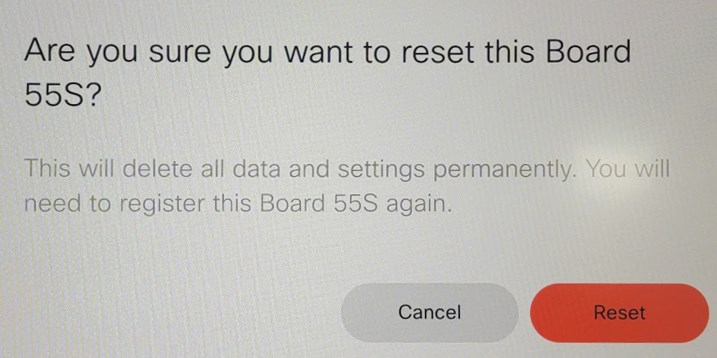
Pressing “Factory reset” brought up a confirmation window asking us to confirm that we wanted to delete all data and settings on the device.
We clicked the Reset button, and a few moments later we were presented with the Welcome screen shown below.

Clicking the Start button sent us to the Network Connection menu. In our case, we selected Wi-Fi, selected our Test Lab Wi-Fi network, and entered the network password.

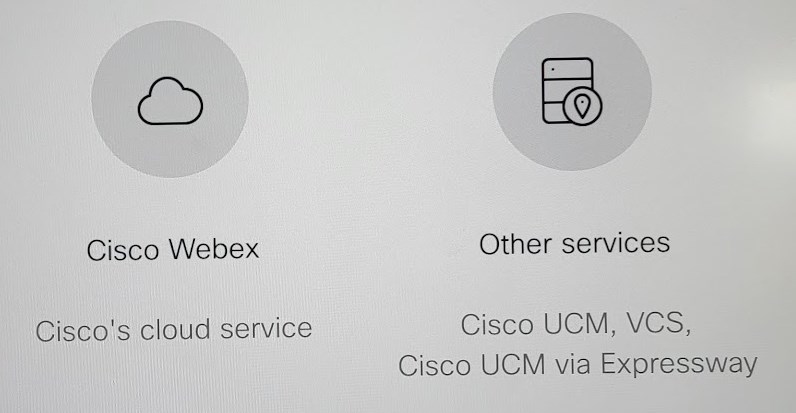
Next, we had to choose our calling service. We chose to connect this Webex Board to our Cisco Webex account.
After choosing Cisco Webex, we were prompted to enter our 16 digit Webex activation code.
Step 2 – Generating the Webex Activation Code
To generate the activation code for our Webex Board, we logged into the Webex Control Hub by visiting admin.webex.com and entering our Webex user credentials.

Once logged in to the Webex Control Hub, we arrived at the Overview page (see screenshot below).

First, we defined a new Location within the system by visiting the Workspace menu and clicking on the Locations tab (see screenshot below). Note – this is a beta feature, so this was our first time defining a location within the system.

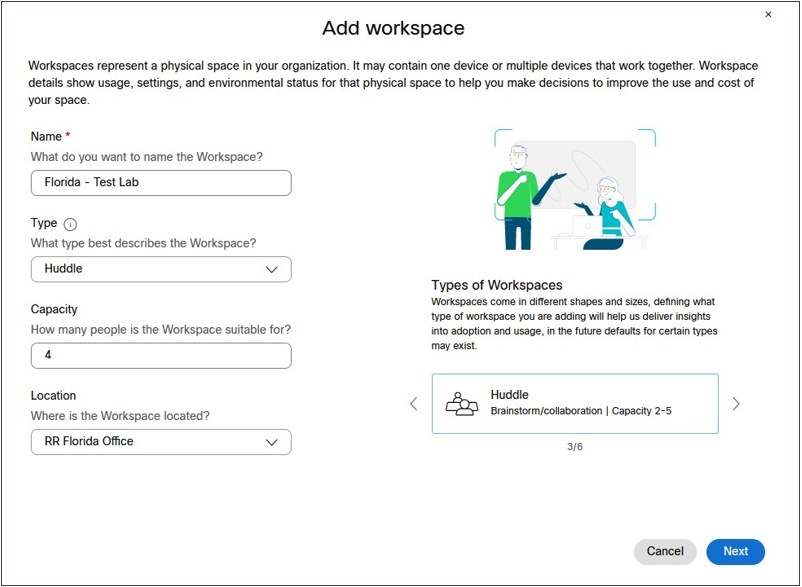
Next, we defined a Workspace called “Florida – Test Lab.” In our case, we defined the Test Lab as a Huddle Room since it has a capacity of 4 – 5 people.
After clicking the Next button, the system asked us if we wanted to set up a device for our new workspace (see screenshot below). We selected Cisco Webex device and clicked the Next button.

We then accepted the default Calling and Scheduling settings for the workspace by clicking Next.

After we clicked Next, the system provided the Activation Code we needed to add our Webex Board to our Workspace.

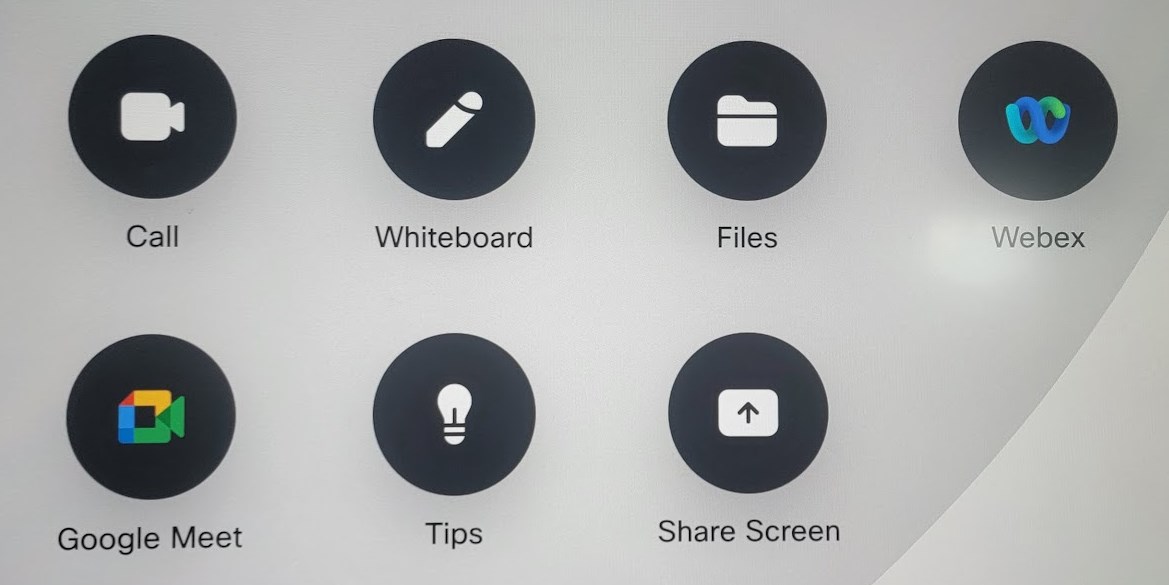
We then entered this activation code into our Webex Board and arrived on the home screen (see image below). We were now ready to create our first whiteboard on our newly registered Webex Board.
Step 3 – Let the Inking Begin
Now we were ready to start inking.
The first option was to press the Whiteboard button and start an anonymous whiteboarding session. Such sessions allow anyone to start inking quickly and easily, but content created is stored directly on the device and automatically deleted at midnight.
The recommended approach is to connect the Webex Board to a meeting or space, at which point all whiteboard content would be stored within that space and available to all meeting invitees or people in the space.
We’ll cover connecting a Webex Board to meetings or spaces in another note.
Summary
As described above, the process for connecting a Webex Board to a Webex account is quite painless.
In our case, it took us ~ 15 minutes to factory reset our Webex Board, create a new location and workspace in Webex Control Hub, and connect our Webex Board to our Webex account.

We then used the Webex Board and Webex’s whiteboarding functionality to create the whiteboard content shown above and complete the client project. All in all, this was a pretty good day.


